Recently, a workshop attendee contacted me, curious about conducting moderated usability tests at trade shows. I’ve conducted these types of tests many times but never realized that sharing this experience could be beneficial for others. So, here are the six things I told the attendee he found most helpful.
First off, moderated usability testing at trade shows is challenging but immensely rewarding. Trade shows offer a unique environment conducive to efficient and comprehensive data gathering. They provide the rare advantage of a captive audience of real users, primed and ready to contribute to your research initiatives. However, along with these great opportunities come specific challenges.
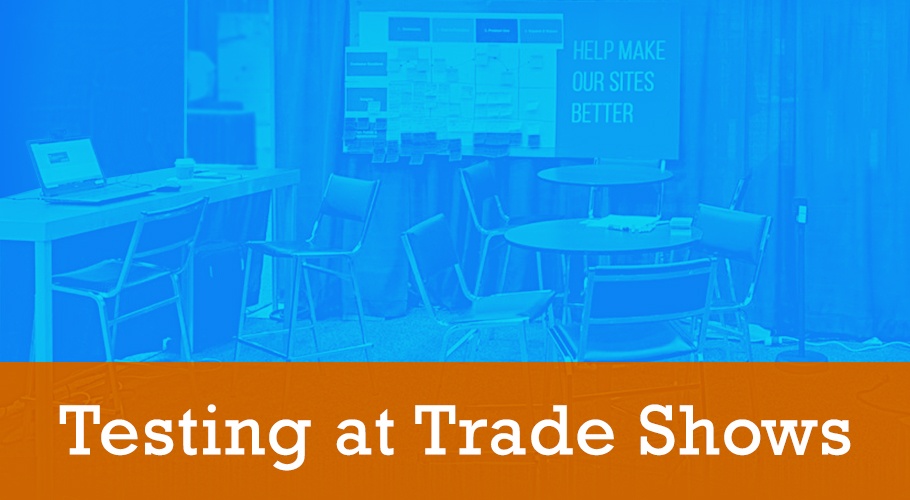
User testing station at a trade show
Tip 1: Keep Your Tests Shorter Than Usual
For most standard usability tests, I recommend 10-15 user tasks set in real-world scenarios. This is because 10-15 tasks take most participants around 45 minutes to an hour to complete. After an hour of testing, users often begin to experience fatigue which can affect the data. At trade shows, however, you’ll have far less time. Attendees will likely take your test between informational sessions, during their lunch break, or while visiting vendor booths. In this context, I’ve found that five tasks per test is a good rule of thumb for time-sensitive testing. Aim for a 15-minute mark for each trade show test.
Tip 2: Be Prepared to Conduct Many Tests
Due to the large number of attendees and the optimal number of test participants being 5-8 users per test, plan on conducting several full tests at trade shows. Since trade show tests are shortened to around five tasks, you’ll need to divide your standard full tests into three mini-tests. (Three separate 15-minute mini-tests. These three mini-tests equal a single standard full hour-long test.)
1 full test (standard usability test) = 3 mini-tests (short tests done at a tradeshow)
Even with this 3:1 ratio, you’ll still go through participants fast, so I recommend preparing six or seven full tests for a trade show. Then, prioritize your full tests (15-task tests) in a list and go through the list one full test at a time. Once every task within a full test has been completed by five users in your three mini-tests (5-task tests), move on to the next If you manage to complete all seven tests, return to the first one and add another participant. Repeat this for each test in sequence. This method ensures you are maximizing data collection for your highest-priority tests.
Tip 3: Record Your Sessions
Trade shows can be chaotic, so it’s best to analyze your test data in a more controlled environment after the trade show’s hours. To do this, you’ll need a way to record each session. I’ve found that setting up a video meeting via Zoom, Google Meets, or Microsoft Teams is the most effective and straightforward method:
- Create a new meeting with only you as the invitee before the trade show starts.
- Log in to that meeting on the machine you’ll be conducting the tests on and ‘share’ your screen in the meeting software.
- Record the sessions, making sure each individual test is saved somewhere as an individual video file. I do this in Zoom by simply selecting ‘stop recording’ after a session and selecting ‘start recording’ when a new session begins.
Video meetings are ideal for gathering moderated usability test data because they capture both the site/app screen and the participant’s facial expressions as they execute tasks.
Important Note: Make sure each participant signs a consent form before you start recording, and also have them verbally consent in the video after you’ve hit the ‘record’ button.
Tip 4: Use a Screening Sheet
Even though trade shows are packed with representative users, it’s important to understand the demographics of the people you test. A screening sheet expedites the participant intake process, establishes a queue, and ensures a consistent flow of participants. It also provides social proof to other attendees that your study is worth their time. No recruiting tactic is more effective and persuasive than seeing a line of people waiting to participate in a session.
Process Recommendation: A screening sheet is also the perfect place to have participants sign the consent form.
Tip 5: Offer Participation Incentives
Another effective strategy to ensure you are booked for the entire trade show is to offer prizes for participation. $25-$50 gift cards for Amazon, Starbucks, or Best Buy are usually very effective. Word will quickly spread among the attendees, and soon, people will be queuing up to participate in your test. Of course, this is where the screening sheet comes in handy. Incentive prizes tend to bring out a couple of greedy buggers, so be on the lookout for frauds.
Tip 6: Remember to Bring Chairs
I wish someone had shared this simple logistical tip with me the first time I conducted moderated usability tests at a trade show. Conducting consecutive 15-minute tests for 8-10 hours straight can be physically demanding. Out of all the usability testing types I conduct, trade show tests are the most strenuous on the body by a long shot. Do yourself a favor and bring chairs for you and your participants to sit on during the tests. I can still feel the back pain from a trade show I did in 2016! Hahahaha.
Conclusion
Consider setting up a usability booth at your next trade show. It’s an excellent way to gather large amounts of user behavioral data and interact with a ton of real users within a short timeframe. (You can’t beat the bang for the buck!) You’ll be able to use these opportunities to collect valuable user-centered data and familiarize yourself with your users on a more personal level. The deeper your understanding of your users, the more confident you’ll be in designing products they’ll love.